Background
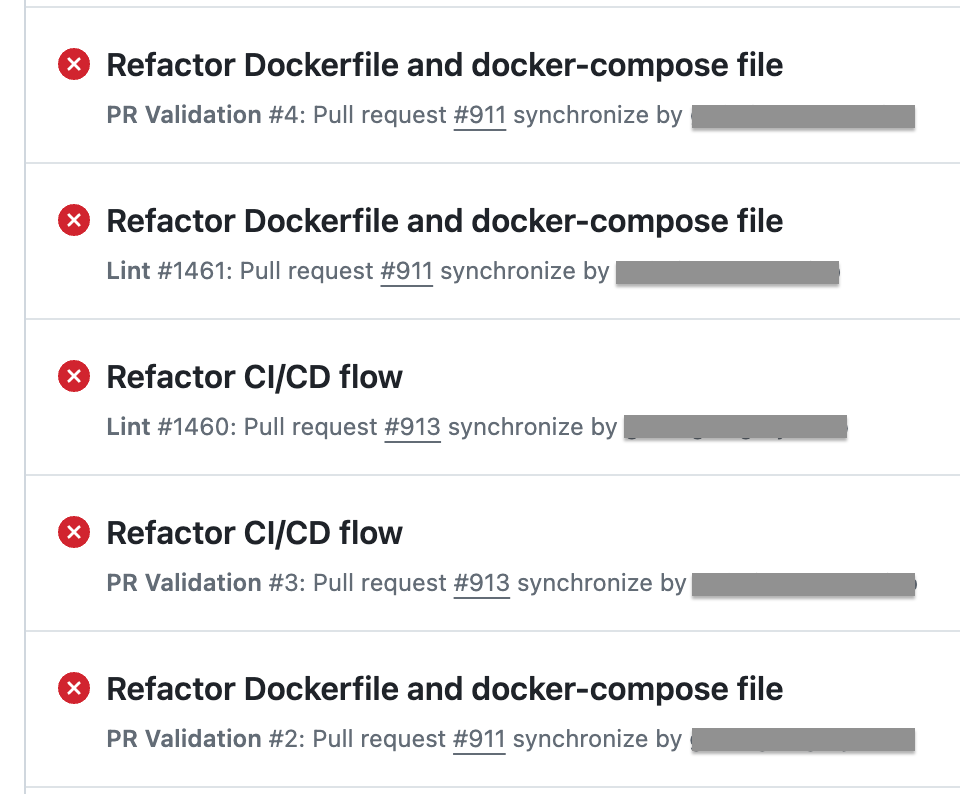
Recently, I needed to use GitHub Actions to complete the CI/CD flow for a project. Based on my previous experiences, I've encountered numerous challenges in validating GitHub Actions, which required me to submit multiple commits to check if they were functioning properly, as shown in the following picture.
This time, I started looking for a tool or solution that could allow me to validate the script in my local environment and save a lot of time. In this blog, I will show you how I use Act to complete and validate GitHub Action scripts in my local environment.
Act is a tool that can run your GitHub Actions locally!
ACT Installation
I used the homebrew to install the ACT on my Mac.
$ brew install actUsage guide
I will use the repo of github-action-demo to demonstrate some basic usage and complete the following case study section.
 cplee
cplee$ git clone git@github.com:cplee/github-actions-demo.git
$ cd github-actions-demo
$ act -l --container-architecture linux/amd64
INFO[0000] Using docker host 'unix:///var/run/docker.sock', and daemon socket 'unix:///var/run/docker.sock'
Stage Job ID Job name Workflow name Workflow file Events
0 test test CI main.yml pushact will run all jobs in every workflow in .github/workflows.First, we run the act -l command, which will show all the workflows within the repo; as we can see, there is only one workflow called main.yml and the content of main.yml would be:
name: CI
on: push

jobs:
  test:
    runs-on: ubuntu-latest
    steps:
    - uses: actions/checkout@v2
    - uses: actions/setup-node@v1
    - run: npm install
    - run: npm test
It's pretty simple: just run an ubuntu-latest environment, install the necessary packages, and then try to pass all the sts within the tests folder. Next, let's focus on the second line of this file: on: push. What does this mean? It means this CI workflow will only be triggered when a push event occurs.
Let us do some simple experiments:
$ act pull_request
INFO[0000] Using docker host 'unix:///var/run/docker.sock', and daemon socket 'unix:///var/run/docker.sock'
Error: Could not find any stages to run. View the valid jobs with `act --list`. Use `act --help` to find how to filter by Job ID/Workflow/Event Name
We used Act to mock the pull_request event, but encountered an error message stating that no stages were found to run. This is expected because the workflow is only triggered by the push event. Next, we will use Act to mock the push event and see what happens.
➜ act --container-architecture linux/amd64 push
INFO[0000] Using docker host 'unix:///var/run/docker.sock', and daemon socket 'unix:///var/run/docker.sock'
[CI/test] 🚀  Start image=catthehacker/ubuntu:act-latest
[CI/test]   🐳  docker pull image=catthehacker/ubuntu:act-latest platform=linux/amd64 username= forcePull=true
[CI/test] using DockerAuthConfig authentication for docker pull
...
...
...
As we can see, it trigger the workflow successfully, pretty simple right? Ok, now we know how to use the act to trigger the workflow, next we will delve into a more complicated case in the next section.
Case Study
In this case, we have several goals to complete within the CI flow:
- Run the tests
- Upload a file to the AWS S3
- Build the docker image and push it to AWS ECR
The original main.yml already covers the goal of running the tests, so we'll skip that part. For the second goal, uploading a file to AWS S3, we want to use Act to test the CI flow in our local environment. Therefore, we also need a local AWS service to help complete the testing environment. LocalStack is a tool that allows you to develop and test your AWS applications locally, reducing development time.
For the second and third goals, we will integrate LocalStack with Act to complete the entire CI flow in our local environment.
Please follow the instructions on the LocalStack official website to install and set up the necessary credentials; I won't cover that part here.
Upload a file to S3
Next, we use the AWS command to create a S3 bucket demo . Later, we will upload a file to this bucket when we run the CI flow.
$ aws --endpoint-url=http://localhost:4566 --profile localstack s3 mb s3://demo
make_bucket: demo
$ aws --endpoint-url=http://localhost:4566 --profile localstack s3 ls
2024-07-21 13:13:24 demo
After successfully creating the bucket, we will add some AWS-related scripts to complete the CI process.
name: CI
on: push

jobs:
  test:
    runs-on: ubuntu-latest
    steps:
      - name: Checkout code
        uses: actions/checkout@v3

      - name: Setup the node
        uses: actions/setup-node@v1

      - name: Install packages
        run: npm install

      - name: Run the tests
        run: npm test

      - name: Install AWS CLI
        run: |
          sudo apt-get update
          sudo apt-get install -y awscli

      - name: Configure AWS CLI
        run: |
          mkdir -p ~/.aws
          echo "[profile localstack]" > ~/.aws/config
          echo "region = us-east-1" >> ~/.aws/config
          echo "output=json" >> ~/.aws/config
          echo "[localstack]" > ~/.aws/credentials
          echo "aws_access_key_id = test" >> ~/.aws/credentials
          echo "aws_secret_access_key = test" >> ~/.aws/credentials
          echo "Complete Configure AWS CLI"

      - name: Upload file to S3
        run: |
          aws --endpoint-url=http://localhost:4566 --profile localstack s3 cp src/upload.txt s3://demo
Then, re-running the act push command to see the result.
$ aws --endpoint-url=http://localhost:4566 --profile localstack s3 ls s3://demo
2024-08-18 10:50:11          0 upload.txt
Great! Now, we can upload the file to the S3 successfully, and let's move on to the next section.
Build the Docker image and push it to AWS ECR.
At the beginning of this section, we need to use the LocalStack to create an ECR repository first.
$ aws --endpoint-url=http://localhost:4566 --profile localstack ecr create-repository --repository-name demoPlease note that ecr create-repository is a pro feature of LocalStack. If you want to use it, please consider applying for their hobby subscription.Then we need to get the repositoryUri for pushing the docker image to the ECR later, here is another command to retrieve the repositoryUri info.
$ aws --endpoint-url=http://localhost:4566 --profile localstack ecr describe-repositories
{
    "repositories": [
        {
            "repositoryArn": "arn:aws:ecr:us-east-1:000000000000:repository/demo",
            "registryId": "000000000000",
            "repositoryName": "demo",
            "repositoryUri": "000000000000.dkr.ecr.us-east-1.localhost.localstack.cloud:4566/demo",
            "createdAt": "2024-08-18T14:36:16+08:00",
            "imageTagMutability": "MUTABLE",
            "imageScanningConfiguration": {
                "scanOnPush": false
            },
            "encryptionConfiguration": {
                "encryptionType": "AES256"
            }
        }
    ]
After completing the setup, we need to add some steps to finish this section.
name: CI
on: push

jobs:
  build:
    runs-on: ubuntu-latest
    steps:
      - name: Checkout code
        uses: actions/checkout@v3

      - name: Setup the node
        uses: actions/setup-node@v1

      - name: Install packages
        run: npm install

      - name: Run the tests
        run: npm test

      - name: Install AWS CLI
        run: |
          sudo apt-get update
          sudo apt-get install -y awscli

      - name: Configure AWS CLI
        run: |
          mkdir -p ~/.aws
          echo "[profile localstack]" > ~/.aws/config
          echo "region = us-east-1" >> ~/.aws/config
          echo "output=json" >> ~/.aws/config
          echo "[localstack]" > ~/.aws/credentials
          echo "aws_access_key_id = test" >> ~/.aws/credentials
          echo "aws_secret_access_key = test" >> ~/.aws/credentials
          echo "Complete Configure AWS CLI"

      - name: Log in to LocalStack ECR
        run: |
          aws ecr get-login-password --region us-east-1 --endpoint-url=http://localhost:4566 --profile localstack

      - name: Build Docker image
        run: |
          docker build -t github-action-demo:latest .

      - name: Tag Docker image
        run: |
          docker tag github-action-demo:latest localhost:4566/demo/github-action-demo:latest

      - name: Push Docker image to LocalStack ECR
        run: |
          docker push 000000000000.dkr.ecr.us-east-1.localhost.localstack.cloud:4566/demo/github-action-demo:latest

      - name: Upload file to S3
        run: |
          aws --endpoint-url=http://localhost:4566 --profile localstack s3 cp src/upload.txt s3://demo
Next, we will trigger the act push again to see the result.
$ act push
...
...
...
[CI/build]   ✅  Success - Main Build Docker image
[CI/build] ⭐ Run Main Tag Docker image
[CI/build]   🐳  docker exec cmd=[bash --noprofile --norc -e -o pipefail /var/run/act/workflow/8] user= workdir=
[CI/build]   ✅  Success - Main Tag Docker image
[CI/build] ⭐ Run Main Push Docker image to LocalStack ECR
[CI/build]   🐳  docker exec cmd=[bash --noprofile --norc -e -o pipefail /var/run/act/workflow/9] user= workdir=
| The push refers to repository [000000000000.dkr.ecr.us-east-1.localhost.localstack.cloud:4566/demo/github-action-demo]
0fe414dcbcfc: Layer already exists
905029b2faaa: Layer already exists
85dfe2a5d583: Layer already exists
41d31c4461e4: Layer already exists
e8ec0d6af932: Layer already exists
eb8031fe07bc: Layer already exists
67580865a2da: Layer already exists
66fe03bf3f29: Layer already exists
f752cb05a39e: Layer already exists
20f026ae0a91: Layer already exists
f21c087a3964: Layer already exists
cedb364ef937: Layer already exists
latest: digest: sha256:36dbf0d1894f7af04c8fefba107cb2cd0c609112ad17c71af6d91529cba5a61c size: 2839
[CI/build]   ✅  Success - Main Push Docker image to LocalStack ECR
[CI/build] ⭐ Run Main Upload file to S3
[CI/build]   🐳  docker exec cmd=[bash --noprofile --norc -e -o pipefail /var/run/act/workflow/10] user= workdir=
upload: src/upload.txt to s3://demo/upload.txt                  ng
[CI/build]   ✅  Success - Main Upload file to S3
[CI/build] Cleaning up container for job build
[CI/build] 🏁  Job succeeded

INFO    ️📣 A newer version of 'act' is available - consider ugrading to 0.2.65.
Congratulations! We can now successfully run the full CI flow to complete our job.
Key Takeaways
In this post, we demonstrate how to use Act to develop GitHub Action scripts in your local environment with LocalStack. Doing so can save a lot of time when validating the scripts, enjoy!

