I used the ghost blog for many years, but unfortunately, I stopped updating my previous blog for almost two years, and the ghost version was still 3.0, and there’s the ghost 5.0 now!!.
I think it’s time to reopen my blog and write this article to share the process I set up for the new ghost blog, hope you guys enjoy it.
There’re some services I used for the ghost I host myself.
- Digital Ocean
- Cloudflare
How to install Ghost on Digital Ocean
Today, there’s an app in the marketplace of the digital ocean, so we don’t need to install Ghost/MySQL/Nginx by ourselves anymore, just click a button and wait for 2 minutes, then you will see the instance is running the ghost service.
Go to this link, and click the “create ghost droplet”.
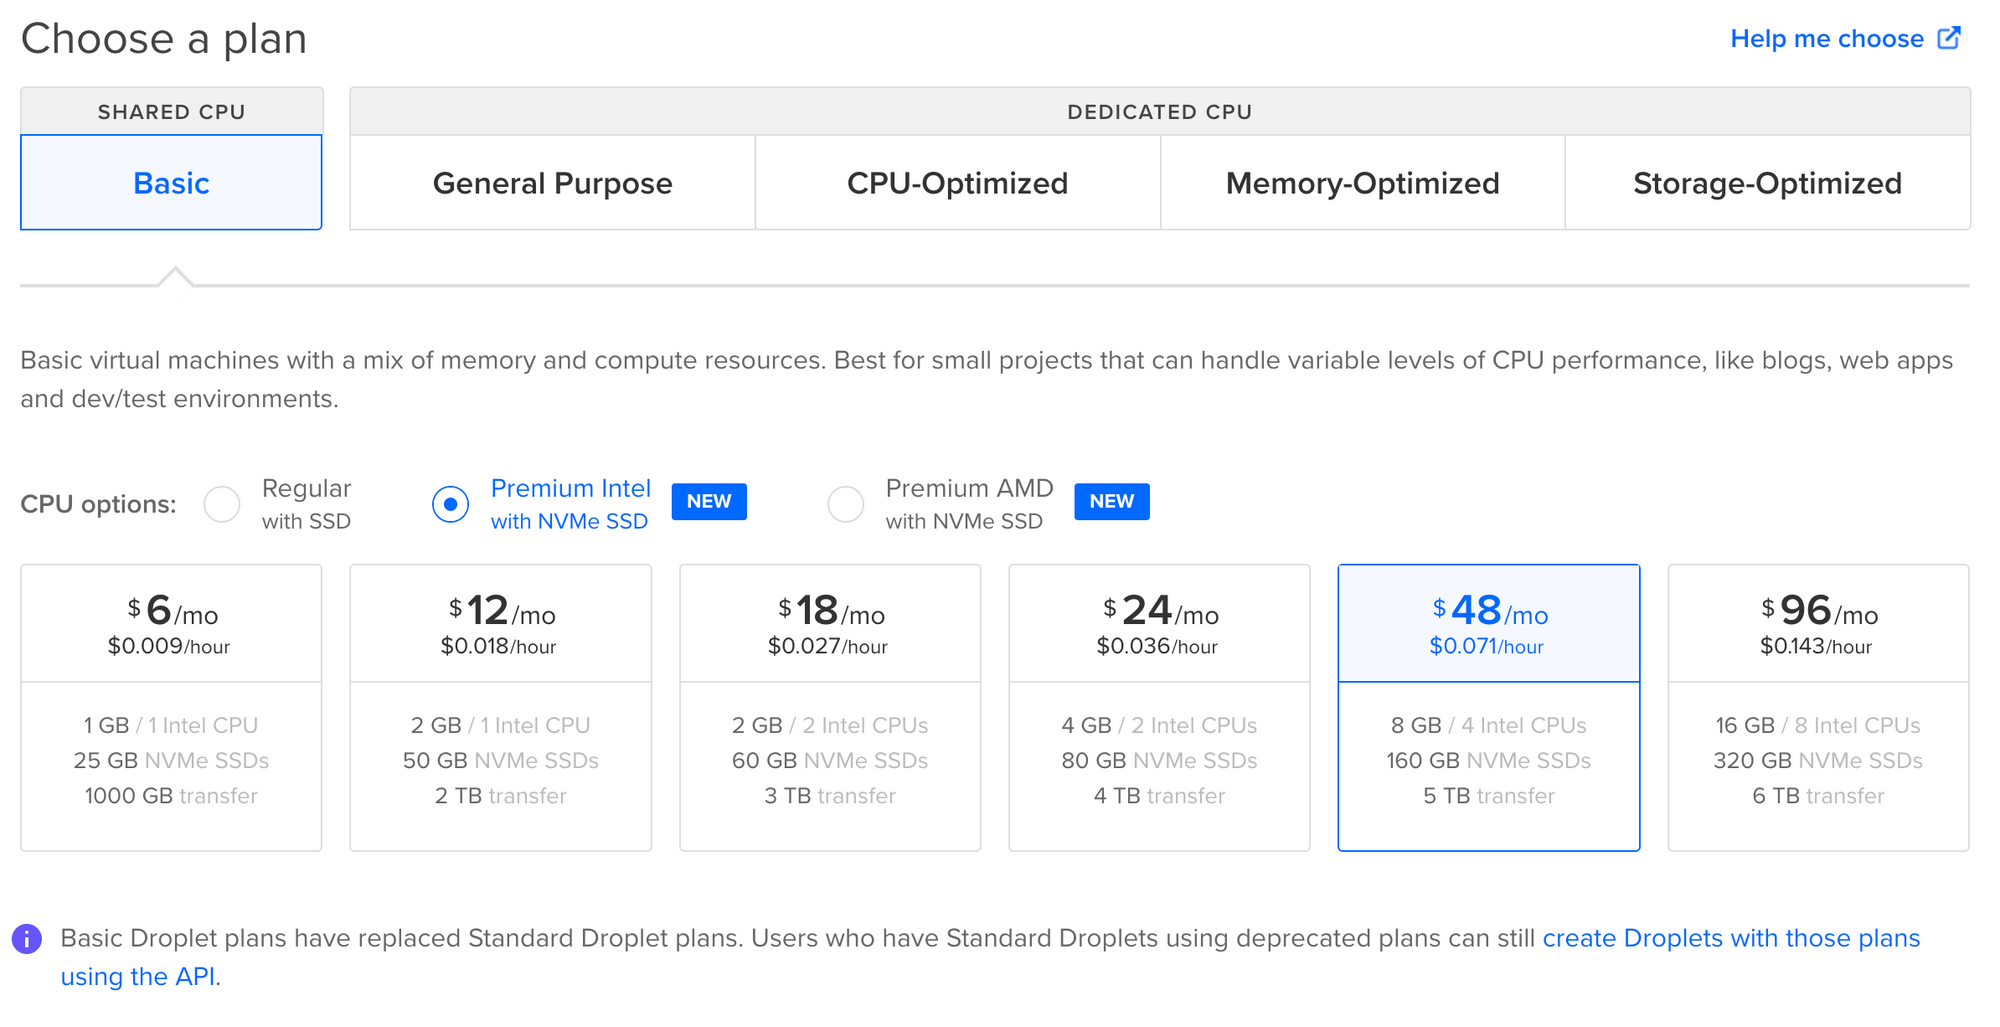
For most users, the $10 base option is sufficient to run the app; then, you can choose your favorite datacenter region. For the authentication part, if you don’t know the ssh key, you can select the password instead of the ssh key, then create a droplet.
After 2 minutes, you will see there’s a new droplet running on the droplets dashboard.

DNS Record
I bought taiker.space domain at the Namecheap before, and switch the DNS management to Cloudflare, So now I need to create an A record for the blog.
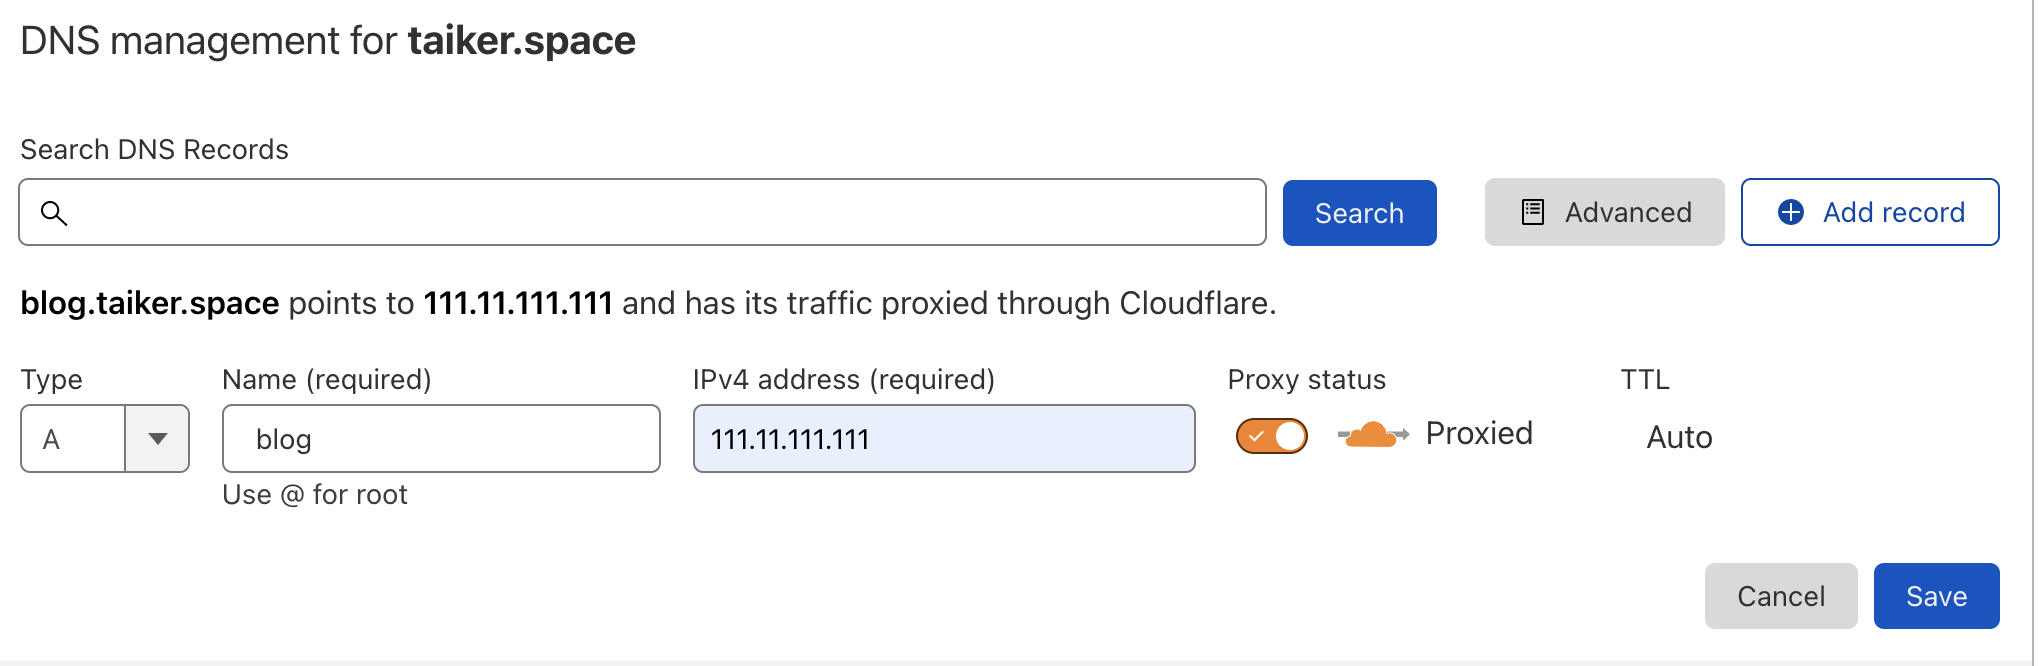
- Name: fill out the subdomain you want.
- IPv4 address: copy this value from the droplets dashboard. There’s an IP address on your droplet.
Before going to the next step, you must wait until the DNS record works. use the following link to check whether the record is correct.
Server setup
Next, we must log in to the service to finish the installation. Click the rightmost button and choose the access console one. When you get to the Droplet Console page, you will see the Launch Droplet Console button, and click it; you will see a new window pop up.
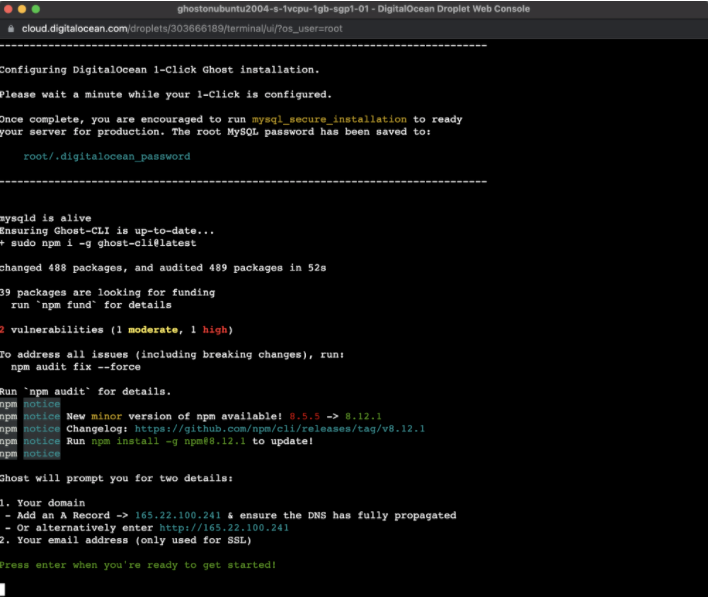
Then follow the console steps to finish the final setup.
- Press the Enter to continue
- Enter your blog URL:
blog.taiker.space - Enter your email (For SSL Certificate):
[email protected]
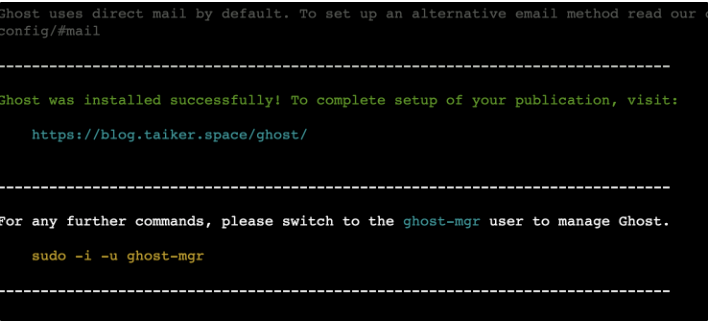
After completing, you will see the following message.
Ghost Admin
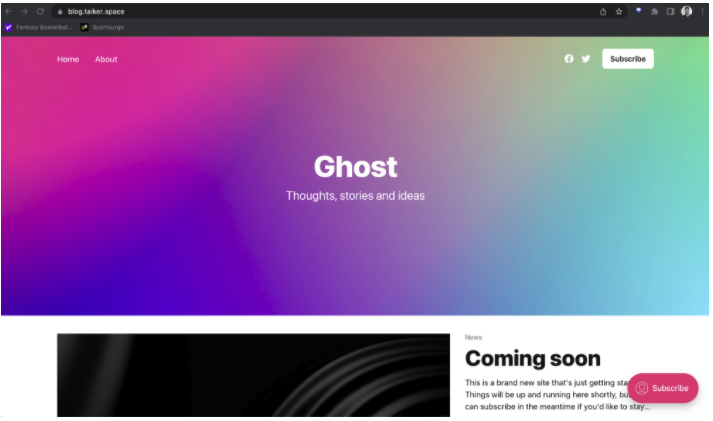
Open your browser and go to your blog address, for me, it’s https://blog.taiker.space/; you will see your blog is online; great.
So what’s the next? We need to go to ghost admin to manage our blog and type the URL with /ghost ex: https://YOURBLOG/ghost to create an account for the ghost admin.
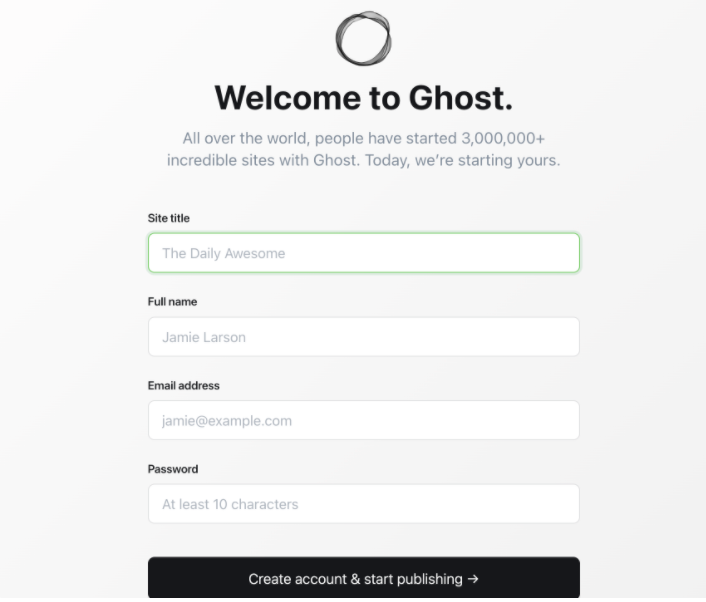
After creating the account, you will go into the admin page, and you can explore the admin page, congrats!
Change the theme (Optional)
If you also want to use the same theme as me, you can go to Fizzy-Theme to download the theme. Use upload it through ghost admin. (⚙ → Design → Change theme → Upload theme)
If you want the archive post page like me, you need to download the Fizzy-Theme from my Github; I made some changes to let you add the archive page easily. After uploading the theme, you need to add new navigation in ghost admin. (⚙ → Navigation)


